I made char siew chee cheong fun since I have some char siew left in the fridge. Very nice. Using estimation method, I made the salty/sweet sauce to go with the CCF. The sauce is something like the one served at dim sum restaurant.
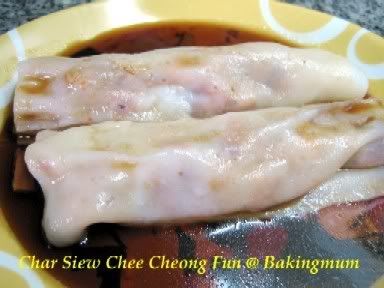
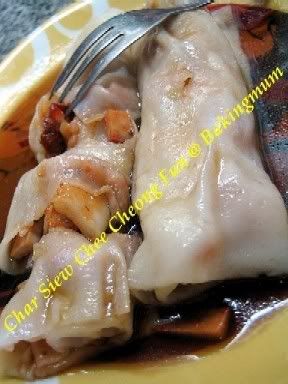
Finally got my friend's approval to post the CCF recipe in my blog. I have however change the method slightly to omit using the muslin cloth. I also did not use my friend's recipe for the tim cheong (sweet sauce) but instead create one for my own liking. For those who would like to try this out, remember to let me know how it turn out for you ok.
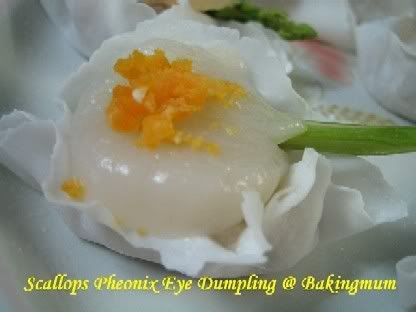
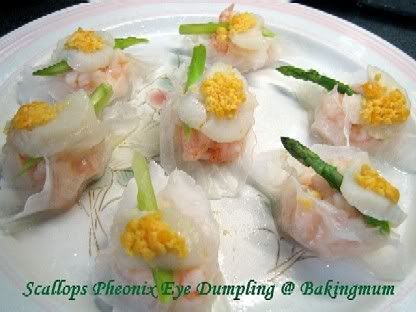
Dim Sum Style Chee Cheong fun
Ingredients :
150g Rice Flour
1 ½ Tbsp Wheat starch flour
2 Tbsp Corn flour
1 Tbsp Oil
2 cups Water
½ tsp Salt
Method :
1. Sift dry ingredients together.
2. Slowly add the water, mixing as you add.
3. Lastly add the oil and salt and mix thoroughly. Set batter aside for at least an hour.
4. Prepare your steamer. Grease a swiss roll pan or any aluminium tray with oil and pour the batter directly on the pan and steam for 5 mins.
5. After steaming, using a plastic scrapper roll the ccf up. If you are using ingredients like char siew or prawns, you can sprinkle it over the steamed ccf and then proceed to roll it up.
6. Place in a plate brushed with a little oil. Continue with the rest of the batter.
Sauce (my own version)
Ingredients
1 tbsp oil
2 tbsp sugar
a few slices of ginger (optional)
½ cup water
4 tbsp mushroom flavoured soy sauce or normal light soy sauce
½ to 1 tbsp dark soy sauce
1. Place ginger with oil and sugar in a pot. Cook over small fire until sugar turns brown.
2. When sugar is brown, add in the rest of the ingredients. Cook over medium fire for about 5 mins. Taste the sauce and adjust taste accordingly. If you find the sauce too sweet, you can add in a bit of salt.
Sweet sauce (cwl's recipe)
1/2 cup water
7 tbsp Hoisin sauce
3 tbsp soya sauce
3 tsp dark soya sauce
Mix all ingredients together and cook over medium heat until it thicken slightly.
Sunday, January 28, 2007
Char Siew (non-bake version)
I was actually looking for something in my old recipe file but couldn't find it. Instead came across this non-bake char siew. Since hubby was going to do the marketing today, I got him to buy me some pork to make this char siew.
Here is the recipe and the step-by-step pictures of how it is being done.
Char Siew
500 gm pork (wu hua)
70 gm sugar
¾ tsp salt
1 tbsp light soy sauce
1 tbsp dark soy sauce
300 ml water
a little red colouring powder
2 tbsp oil
Method:
Mix sugar, salt, light soy sauce, dark soy sauce, water and colouring in a mixing bowl.
Add in pork and marinate for at least 4 hrs.
Pour seasoning sauce in a pot and bring to a boil. Add in pork and let it boil.
Lower fire and simmer meat until tender and sauce thickens.
Lastly add in oil so that surface of char siew will be glossy.
Marinate pork for 4 hours.
Bring the marinate sauce to a boil.
Add in the seasoned pork to the pot and bring to a boil.
Lower fire and simmer pork until the sauce thickens.
Marinate sauce thickens.
Ready to eat char siew.
I have added a little bit of diluted sauce over the char siew.
Sunday, January 21, 2007
Step-by-Step pictures of making fish jelly
I have been asked to show some step-by-step photos of how to make the fish jelly. Since I was making some for a family gathering at Pasir Ris holiday bungalow this weekend, I have taken the opportunity to take down the steps for you.
Colour the coconut jelly with the colour of your choice. Using a spoon to spoon some jelly onto the fins and tail of the fish mould.
The jelly will get thicker as it cools down. You can spoon the thicken jelly from the mould onto the fins/tail until you see a layer of jelly formed on it.
The next step is to pour in different colours for the fish into the mould. It doesn't matter if the jelly is not fully harden yet. The mixing of the different colour jelly will give the fish a nice natural marble effect.
Unmould fish and place it in a tray in any order you prefer like this.
Pour the clear jelly coloured with either green or blue over the prepared tray.
Leave it to cool down before refrigerating it for at least a few hours before serving.
I hope that these step-by-step explanations will give you a better idea of how to do this fish jelly. Give it a try for this coming CNY ok!
Tuesday, January 16, 2007
In preparation for Chinese New Year!
Since CNY is just a month away, I am in preparation for it already. Trying out some different patterns to make 'Nian Nian You Yu'. This means abundance fortune or it also means that every year you will always have surplus of fortune.
Last year my 'Nian Nian You Yu' was done using konnayku jelly, which is this one here.
This time round I tried using agar agar powder to make these.
Last year my 'Nian Nian You Yu' was done using konnayku jelly, which is this one here.
This time round I tried using agar agar powder to make these.
Monday, January 15, 2007
Salmom Teriyaki
Ingredients:
2 pcs of salmon fillet
Seasoning:
5 tbsp mirin
2 tbsp Japanese dark soy sauce
3 tbsp Japanese sake
1 or 2 tbsp sugar (depending on how sweet you want)
100 ml of water
(Note: the tbsp used here is the Chinese soup spoon)
Methods:
1. Wash and pat dry the salmon with kitchen towel. Pan-fry the salmon until golden brown. Set aside on a plate.
2. In a frying pan, boil the seasoning over medium-high heat. To determine how long to cook the seasoning will depend on how thick the sauce you want. If you want it thicker, you need to cook it longer. Please note that you should taste the sauce to see if you like the sweetness of it. If you find it not sweet enough, you can add more sugar into it.
3. After sauce has thicken, pour the sauce over the salmon and serve it hot with steamed rice.
Sunday, January 14, 2007
Baked Tapioca Kueh
I have been wanting to make this kueh for a while but it seems difficult recently to find tapioca. But today I saw it selling at the market so I quickly grabbed some in case I don't see them again. I replaced 2/3 of the sugar with gula melaka and the end result is a very fragrant baked tapioca kueh.
Used white sugar
Used some white and some gula melaka
Ingredients:
1 kg grated tapioca
100 gm castor sugar
200 gm gula melaka (palm sugar)
40 gm melted butter
1 tsp vanilla essence or powder
1/4 tsp of salt
2 eggs slightly beaten
300 ml of thick coconut milk
100 ml of thin coconut milk
Methods:
1. Line a 9x9 inch baking tray with aluminium foil and lightly greased all sides and botton of tray.
2. Dissolve gula melaka and castor sugar with 100 ml of thin coconut milk. Sift and set aside.
3. Mix all other ingredients into a mixing bowl. Pour the sifted sugar mixture in and mix well. Pour it into the prepared tin.
4. Bake it in a pre-heated oven at 190C for about 1 hr to 1 hr 15 mins until the top is brown. Use top and bottom fire.
Sunday's Dinner
Since I was stuck at home with the rainy weather outside, I have decided to cook this black sauce chicken for dinner later.
There are garlic, galanga, ginger, cloves, cinnanon stick, star anise that I used for this dish.
My son also requested for teriyaki salmon and miso soup for dinner and here they are.
There are garlic, galanga, ginger, cloves, cinnanon stick, star anise that I used for this dish.
My son also requested for teriyaki salmon and miso soup for dinner and here they are.
Saturday, January 13, 2007
Wanton Soup
Hubby recently went on a business trip to Hong Kong and came back with praises for the wanton he ate in Hong Kong. He described to me what the dumpling he ate was like and since he missed eating it so much, I have decided to try making it to see if that is what he is looking for.
Here is my wanton soup. This is my second try actually. This time round, hubby says it is very near to the actual one already. Well, still room for improvement in another word. Hehehe.
Scallops Pheonix Eye Dumpling
Hahaha this is a big name for a simple timsum dish. It is actually har kow skin wrapped with prawns and topped with asparagus and scallops. Actually the recipe asked for prawn roe but since I did not have it, I substituted it with salted eggyolk. This will be the second recipe that I am trying from the Delicious Dim Sum book that I bought.
This is before steaming.
Another closeup view of a before steaming dumpling
After 5 mins of steaming, the dumplings are ready to be eaten.
This is before steaming.
Another closeup view of a before steaming dumpling
After 5 mins of steaming, the dumplings are ready to be eaten.
Subscribe to:
Posts (Atom)